|
| SHOP | • | ARCHIVE | • | MKH NEWS | • | PFI | • | SHOPPERS' UPDATE | • | HOME |
| MY LIFE |
|
|
| MY SIMCHA |
|
|
| MY YEAR |
|
|
EZ-Bild Sukkah II
9/29/17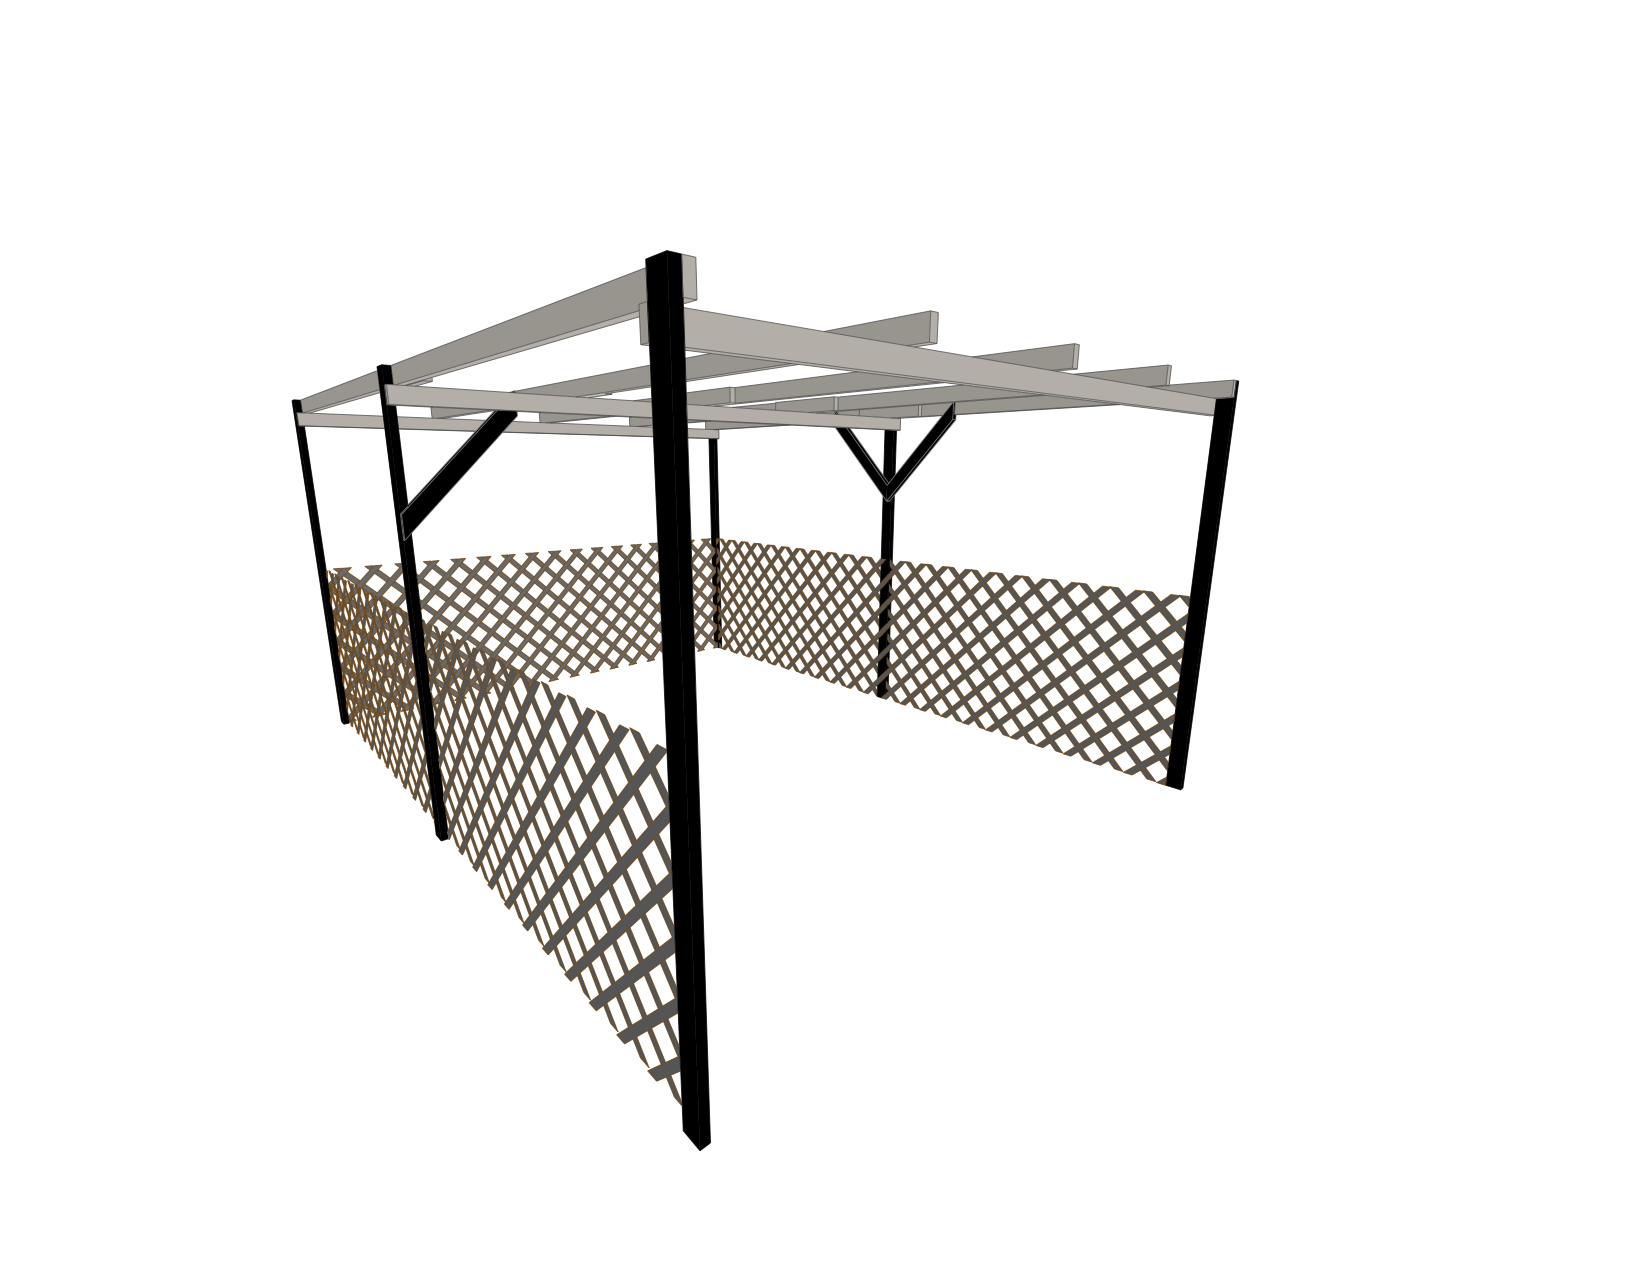
Unlike the EZ-Bild I which used 1 x 4's, this
model uses 2 x 4's. 1 x 4's of good quality and at a good
price have become scarce. This sukkah is fairly quick and
easy to build with two people, and with no cutting except for
the braces/splices.
If you are searching the internet for a sukkah kit, generally beware...they look easier to put together than they are. Especially be wary of the Sukkah Project kits which send you brackets and screws to which you add the lumber. The brackets are flimsy and require attachment with many of the cheap, dull screws they provide. If as you're erecting the completed assemblies and you don't keep everything straight and in the same plane, the brackets will bend or even pop their weak welds. Once completed the sukkah wobbles ominously. It's true they don't charge a lot, but you don't get a lot either.
If you are searching the internet for a sukkah kit, generally beware...they look easier to put together than they are. Especially be wary of the Sukkah Project kits which send you brackets and screws to which you add the lumber. The brackets are flimsy and require attachment with many of the cheap, dull screws they provide. If as you're erecting the completed assemblies and you don't keep everything straight and in the same plane, the brackets will bend or even pop their weak welds. Once completed the sukkah wobbles ominously. It's true they don't charge a lot, but you don't get a lot either.

This model will seat 14-16...if you need more,
add more 8' sections and hold the 12' width constant.
Start by positioning 3 uprights either against a convenient wall
or on the ground 8' apart. Use a masonry nail if needed to
afix to wall. Lay down or hold up 2-2 x 4's so they both
overlap the middle upright and are positioned at the top.
Use 2 screws at each joint making sure the members are at right
angles to each other. If either or both long sides are
free-standing, everything noted above may be down flat on the
ground. Then add a 2' splice block where the 2 top pieces
cross, putting two screws on each side of splice block. Regarding
the deck screws: get the more expensive Deckmates with
the special bit...they are less likely to slip as you drive
them in.
Now you either have two completed sides laying on the ground or one afixed to a wall and the other laying on the ground (or both affixed to parallel walls). Unless you have enough helping hands to hold both sides up for the next step, you need to use some of the 2 x 4's to act as temporary braces lightly nailed or screwed to an upright. Starting on one side hold up a 12' 2 x 4 under opposing uprights and put 2 screws at each joint. Notice how the wood itself is the measure for these steps. Continue on until you placed all the cross pieces down the line. If wobbly, you can put 4' 2 x 4's at a diagonal on some or all of the uprights as shown in the 3D view above.
Finish adding the top pieces by splicing 2-2 x 4's together, sliding them up on top at approx. quarter points and holding in place with a screw driven diagonally through the top piece and into the cross piece below.
Roll out a 6' x 16' reed skach on each side, and then another down the middle for a minimum of 3. We've determined mathematically that a typical mat provides slightly more shade than sun, but there are Doubting Thomas's...so add the 3rd roll to silence their quibbles.
Use whatever combination of permanent and temporary walls you need to provide 2.5-3 walls to the sukkah.
Add softwhite bulb lighting...at least 3-4 drops from the top. Never use fluorescent lights...it makes people look like dead meat. You can also use strings of smaller decorative lights, but you'll need a lot to be able to see what you're eating.
Here are the current prices for the EZ Bild II...
3 - 2 x 4 x12' @ 6.98 = 13.31
18 - 2 x 4 x 8' @ 3.47 = 62.46
1 box Deckmate screws = 7.81
sukkah base = 83.58 at Home Depot without tax
add 3 reed skach bundles @ 24.98 = 74.94
add 6 lattice walls @ 28.97 = 173.82
| SUBMISSIONS | • | ADVERTISERS | • | TERMS OF USE | • | PRIVACY |
| ARTICLE ARCHIVE | • | NEWSLETTERS | • | KEYWORD SEARCH | • | HELP | • | HOME |